Ticket generator
Let's break down how to create a QR code ticket generator using Aiflo, step-by-step.
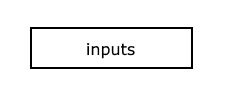
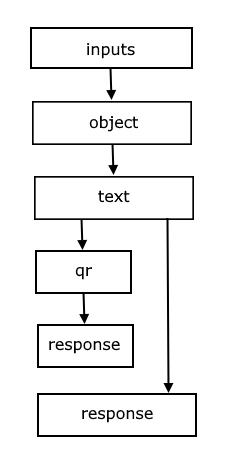
1. Define the inputs
First, we need to gather the necessary information for the ticket. We'll use the inputs node to collect the ticketID, event, and soldTo data.
    [
        {
        "type": "inputs",
        "then": [
          { "target": "ticket_data", "value": "ticketID", "name": "ticketID" },
          { "target": "ticket_data", "value": "event", "name": "event" },
          { "target": "ticket_data", "value": "soldTo", "name": "soldTo" }
        ]
        },
        // ... more nodes to come ...
    ]
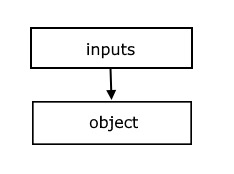
2. Structure the Data
Next, we'll use the object node to structure this information into a JSON object. This object will hold all the ticket details in a clear and organized format.
    [
        // ... (inputs node from step 1) ...
        {
            "name": "ticket_data",
            "type": "object",
            "then": [ { "target": "ticket_json" } ]
        },
        // ... more nodes to come ...
    ]
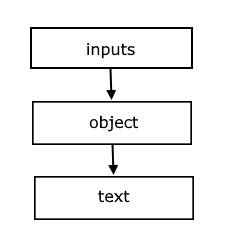
3. Convert to Text
To generate the QR code, we need the ticket data in text format. We'll use the text node to convert the JSON object into a string.
    [
        // ... (inputs and object nodes from previous steps) ...
        {
            "name": "ticket_json",
            "type": "text",
            "then": [
              { "target": "ticket_qr" },
              { "target": "json_response" }
            ]
        },
        // ... more nodes to come ...
    ]
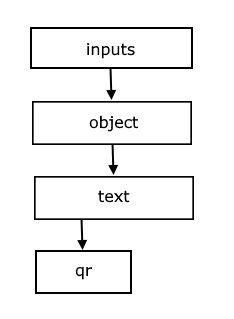
4. Generate the QR Code
Now, we can use the qr node to generate the QR code image. This node takes the text string from the previous step and creates a QR code that encodes the ticket information.
    [
        // ... (inputs, object, and text nodes from previous steps) ...
        {
            "name": "ticket_qr",
            "type": "qr",
            "then": [{ "target": "qr_response" }]
        },
        // ... more nodes to come ...
    ]
5. Define the responses
Finally, we'll define two response nodes: one for the JSON data and one for the QR code image. This allows for flexibility in how the output is used.
    [
        // ... (all previous nodes) ...
        {
            "name": "json_response",
            "type": "response"
        },
        {
            "name": "qr_response",
            "type": "response"
        }
    ]
Complete Code
Here's the complete Aiflo program for the QR code ticket generator:
    [
        {
            "type": "inputs",
            "then": [
              { "target": "ticket_data", "value": "ticketID", "name": "ticketID" },
              { "target": "ticket_data", "value": "event", "name": "event" },
              { "target": "ticket_data", "value": "soldTo", "name": "soldTo" }
            ]
        },
        {
            "name": "ticket_data",
            "type": "object",
            "then": [ { "target": "ticket_json" } ]
        },
        {
            "name": "ticket_json",
            "type": "text",
            "then": [
              { "target": "ticket_qr" },
              { "target": "json_response" }
            ]
        },
        {
            "name": "ticket_qr",
            "type": "qr",
            "then": [{ "target": "qr_response" }]
        },
        {
            "name": "json_response",
            "type": "response"
        },
        {
            "name": "qr_response",
            "type": "response"
        }
    ]
Now it's time to try if out. Fill out the form below and try to read the generated QR code with your mobile.
This step-by-step approach illustrates how Aiflo simplifies the process of building complex workflows by connecting individual nodes. Each node performs a specific function, and the flow of data between them is clearly defined. This modularity and clarity make Aiflo a powerful and user-friendly tool for building a wide range of applications.
Some text in the Modal..